2 things this month:
First! I am going to be a grandma! Kyle and Beth are going to have a baby, so I am very busy making Baby Party Invitations.
Second. I need to make a bunch of birthday cards, and I don't have a lot of time, because I am making a bunch of Baby Party Invitations.
Solution:
I am going to make copies of some cards I made before, for my sister. I really liked them, they are my usual simply constructed cards, that use pretty color combinations. Do you keep copies or pics of your "old" cards or a do you keep sketches of lay-outs and projects you loved? If you do, when you're in a pinch, you can refer back to them, for quick ideas. No need to re-invent the wheel.
Tuesday, August 16, 2011
JULY

June Anniversary Card, Make it Colorful! Make it Creative!

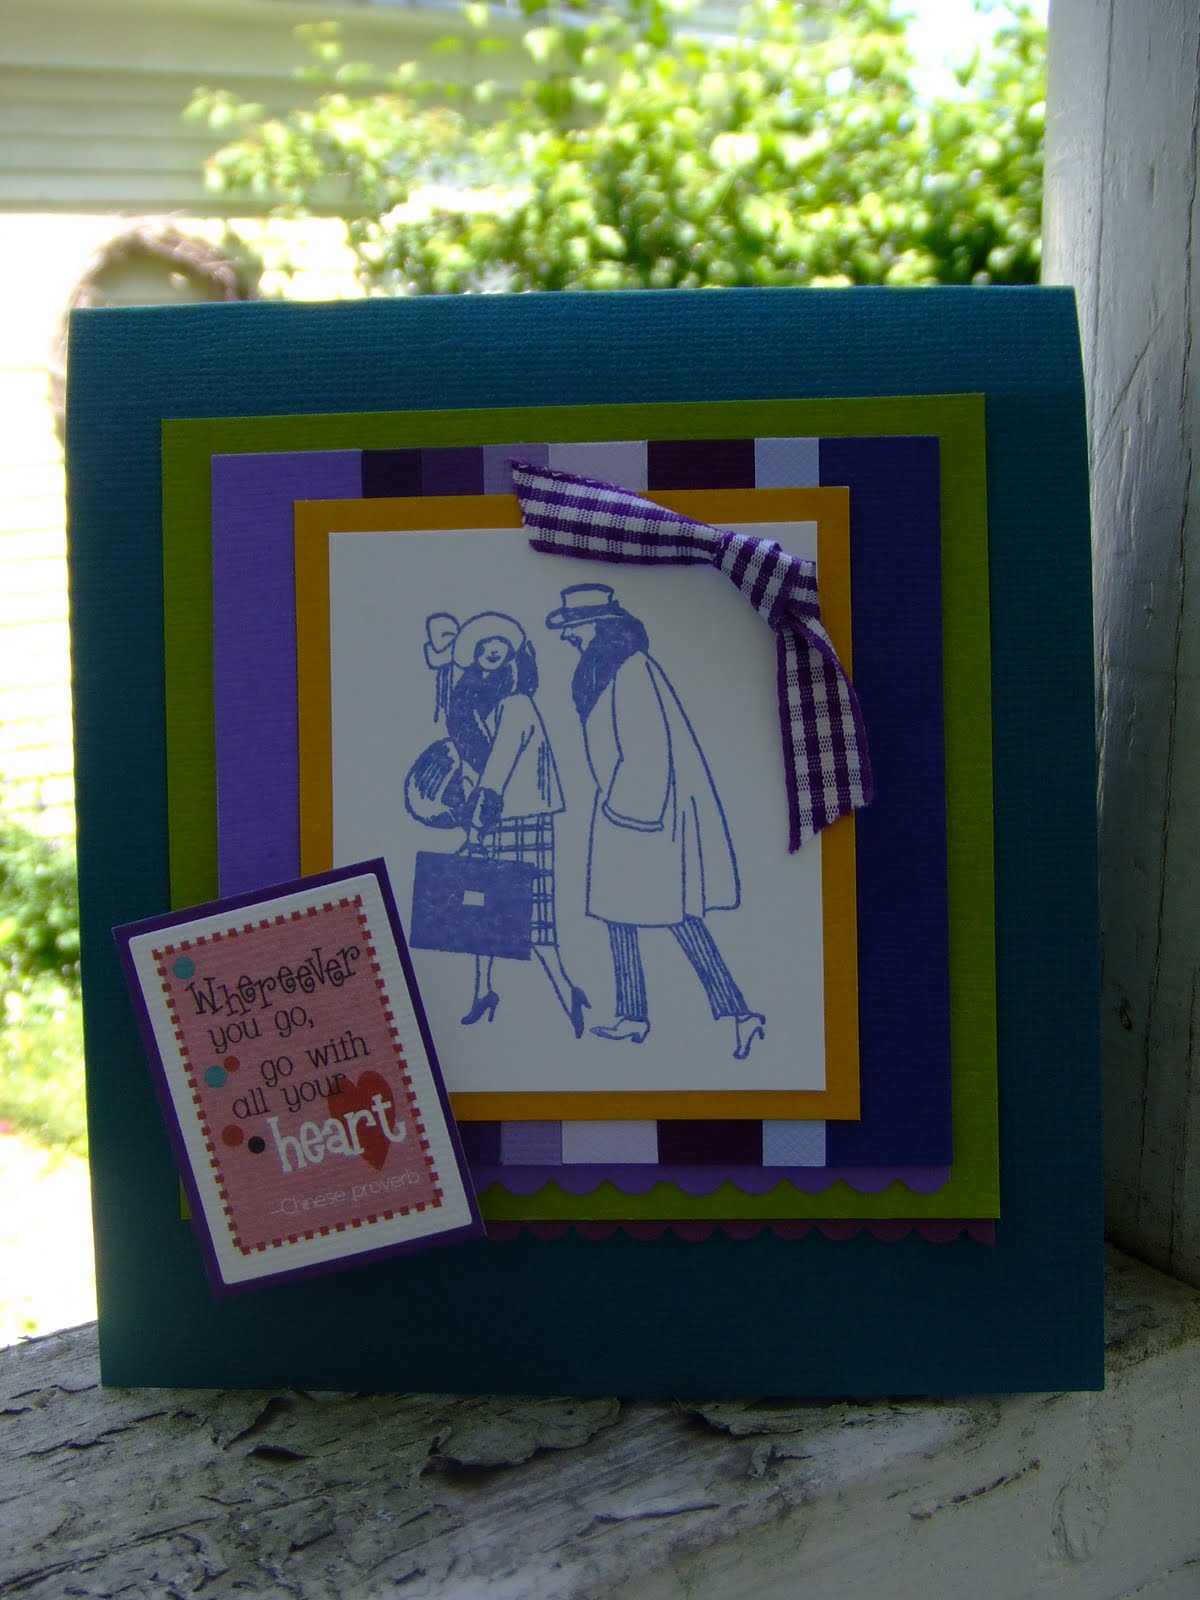

When it came time to make Nic and Allie's anniversary card, I searched my stash, and this stamp reminded me of them, and their journey through life. I really like the way it turned out.
What is nice about this little card is that you can use any stamp and whatever scraps of paper you have lying about. I happened to have used cardstock strips, but it would be a lot of fun with patterned papers, too. I cut strips of cardstock into various widths, to give the card more "movement" and compliment the theme of my card. Essentially, this is a very simple, triple matted card.
1. Create your card base. I selected a blue hue with a lot of green in it.
2. Make your first mat. I selected a yellowy-green. It offers contrast, but is still an analogous color with my dominant purples and blues.
3. Make your second mat from scrap strips. I keep my scrap cardstock separated by colors, so I just pulled out my bag of purple scraps, and I was good to go! You will note that I have papers of almost the exact same size at either side of the mat. That does tend to contain my image a bit. If you are more random, you'll have a more dynamic card.
4. The third mat is a deeper yellow. This darker shade pops my stamped image, and it refers back to my green mat. Both the green and yellow mats are warm, and showcase my two most important elements, the strips mat, and the stamped image (both composed of cool colors).
5. I stamped the image with a lilac ink that looks fresh, and yet has just enough of a vintage feel to work well with the 20's image of my stamp. It's kind of fun to have this old-timey image stamped on this bright, very new looking card front. I like to work against type, just for fun!
6. I trimmed my mats with a scrap of purple gingham ribbon, and scalloped edge trim, in two different shades of purple. I just used scalloped scissors in two different sizes.
7. A ready-made die-cut title block, adhered to yet another purple mat completes my card. Not only does this verse perfectly fit my theme, but, again the colors work well with my card.
8. The size of your card and mats will depend on what stamp you use. Trust your instincts. I am a pretty precise kind of person, but for me, creativity is about experimentation, self-expression and play. So, try what "feels right" and give it a whirl. Work with what you have on hand!
TIP: If you do want to create a cohesive, balanced feel, use patterned papers that all have one color running through them (for example, papers with yellow patterns), or opt for analogous colors of solid papers, like I have done here. The more contrast in your papers, the more lively your card will appear.
I'd love to see your versions of this idea!
Bazzill: Cardstock, Chip Toppers die-cut; Tin Can Mail: Stamp; Stazon: Ink; Provo Craft, The Creative Memories Collection: Decorative Scissors; May Arts: Ribbon; American Crafts: Adhesive
Monday, May 23, 2011
How To Make "Your Inner Cat" Card
Card Inspiration: Do you know someone who has an Inner Cat yearning to break free? Well, this is the perfect card for that special person! Try enclosing a gift card with it, and you have a unique gift for a birthday, congratulations, or thinking of you card! Use a standard A2 envelope, or make your own envelope.
Instructions:
This card depends upon two key elements, very clever stamps from Catslife Press, and beautiful, detailed papers from Graphic 45.
1. Create a standard 4 1/4" x " 5 1/2" side-fold card from Bazill cardstock.
2. Mount a 4" x 5 1/4" light blue paper block to card front. I used Steampunk Debutante, Ephemera Extraordinaire.
3. Cut 2 identical 3 11/16" x 5 7/8" blocks of floral paper. Try Steampunk Debutante Fantasy Floral. I used the left hand corner of the page-you pick whatever appeals to you! Set them aside, while you prepare the rest of your card.
4. Stamp Catslife Press Catslife Definition stamp inside your card. Try American Crafts Inks.
5. Stamp Catslife Press Cat With Crown, on a scrap of ivory cardstock. Trim down.
6. Use American Crafts Glitter Gel Pens, and bits and pieces from your craft table to decorate kitty.
7. Mount Cat With Crown to a scrap of corrugated kraft paper.
8. Free hand cut a banner from ivory cardstock. Mount your title "Inner Cat" with Glitz Design Brown Block Teeny Alpha Stickers.
9. Fold and layer May Arts Pleated Satin Teal Ribbon (secure the folds with glue dots) to your liking. Tack folds by hand stitching. You can allow the stitching to show, for extra interest. Mount the title banner on the ribbon. Adhere the ribbon to the bottom of one of the floral blocks. Mount floral block on card front.
10. Fancy cut flowers from the 2nd floral block, and place on top of identical flowers of first block. Decide where you want the cat image to be, before you adhere anything.
11. Situate and mount Cat With Crown .


 12. Adhere your fancy cuts flowers with pop dots, so that the cat image is peeking from behind themhttp://scrapbookingstory.com/catslife-press.html.
Instructions:
This card depends upon two key elements, very clever stamps from Catslife Press, and beautiful, detailed papers from Graphic 45.
1. Create a standard 4 1/4" x " 5 1/2" side-fold card from Bazill cardstock.
2. Mount a 4" x 5 1/4" light blue paper block to card front. I used Steampunk Debutante, Ephemera Extraordinaire.
3. Cut 2 identical 3 11/16" x 5 7/8" blocks of floral paper. Try Steampunk Debutante Fantasy Floral. I used the left hand corner of the page-you pick whatever appeals to you! Set them aside, while you prepare the rest of your card.
4. Stamp Catslife Press Catslife Definition stamp inside your card. Try American Crafts Inks.
5. Stamp Catslife Press Cat With Crown, on a scrap of ivory cardstock. Trim down.
6. Use American Crafts Glitter Gel Pens, and bits and pieces from your craft table to decorate kitty.
7. Mount Cat With Crown to a scrap of corrugated kraft paper.
8. Free hand cut a banner from ivory cardstock. Mount your title "Inner Cat" with Glitz Design Brown Block Teeny Alpha Stickers.
9. Fold and layer May Arts Pleated Satin Teal Ribbon (secure the folds with glue dots) to your liking. Tack folds by hand stitching. You can allow the stitching to show, for extra interest. Mount the title banner on the ribbon. Adhere the ribbon to the bottom of one of the floral blocks. Mount floral block on card front.
10. Fancy cut flowers from the 2nd floral block, and place on top of identical flowers of first block. Decide where you want the cat image to be, before you adhere anything.
11. Situate and mount Cat With Crown .


Saturday, May 14, 2011
Inner Cat
|
| Cover |
| |
| Inside |
The supplies I used:
- Catslife Press Stamps
- Graphic 45 Papers
- Bazzill Cardstock
- May Arts Ribbon
- Glitz Girl Alphas
- American Crafts Inks and Glitter Pen
- Stampendous Glitter Stickers
Inspiration:
Princess, Cat Extraordinaire!
Tuesday, May 10, 2011
May Flowers
Spring in Maine is lovely. We have beautiful, long, snowy winters, and after five months of wool sweaters and chunky snow boots, a person starts to get antsy -- Spring Fever hits! The moment that we have a day somewhere above 40' out comes the gardening gear. Juan and I take a walk around our little house, and check out the damage. We make a mental list of what we need to pick up at our local gardening shop, and plan our attack. Weeds will need to be pulled. Fresh mulch goes down. We patch any breaks in the fences, and tidy the stone borders. The brick path is neatened, and we will probably have to paint the porch. Salt and wet snow takes its toll. Flower boxes are hauled out of the garage, and every year, for Mother's Day, Juan plants pretty annuals. It's a routine that I look forward to, despite the back ache. There is something therapeutic about it.
Then come the flowers. First the Grape H
I suppose, I could make the connections for you between flower beds and life, but no need. Anyone who has lived through a few winters, knows that Spring, when it comes, and it will come, is a time for hard work, getting things back on track for growth, celebrating the return of familiar beauty, looking for unexpected, new surprises, and letting go of what did not survive Winter's storms. It's a familiar routine. Bring on the flowers!
Sunday, March 6, 2011
March Madness Marriage
It's my anniversary today. I have now been married to Juan longer than I was alive before we met. I have pretty much forgotten having a different last name. I am still the same me of always, but I am not like I was before at all, at the same time. It's amazing how that can happen, isn't it? It's not that being married is always easy, everyone knows that. But, yet... it is really kind of strangely simple. You start living as a family with someone, and before you know it, you have turned into a family. I find that almost miraculous. I know that I probably drive Juan crazy, and not in a good way ; ) and honestly, he is the best man around, but if ONLY he would -- well that's not going to happen, LOL! It is what it is. Marriage is a kind of madness. You commit to someone (that you don't REALLY know yet), when you are way too young to know what in the world you are doing. You make promises that you can hardly begin to know how hard they will be to keep, and you just decide, " I pick you to trust. I pick you to be permanently loyal to. I pick you to love through thick and thin (literally). I pick you to make a life with. I pick you to throw in my lot with." It is madness. The most amazing kind of madness. Happy Anniversary, Juan.
Tuesday, February 15, 2011
To-Do Lists, Projects, and Goals! Oh, MY!
Things are coming along slow but sure with my new online paper crafting store. I can't believe how much I need to learn! I'm still getting a handle on (in no particular order) how to balance two jobs, Facebook, Web Site, Blogs and Etsy projects, family, pets, our garden, the endless work of our version of restoring our old house, organizing my craft room/studio, charities I care about so much, learning how to cook, a secret project that I have been trying to complete for a year (YES! A year), being a friend, living creatively, and my absolutely top of the list goal: to fulfill the promise I have made to myself -- to follow in my friend's good example, and be what she called "God's hand extended"--no matter how scary it gets. I can tell you now, that it is challenging, but that is the stuff our life stories are built of, isn't it? So, here we go!
Subscribe to:
Comments (Atom)